Showing posts with label hurdy gurdy. Show all posts

Friday, October 24, 2008

The Gurdy and the Damage Done


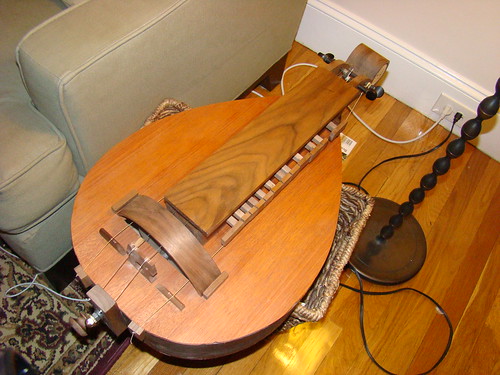
...I've spent the past week or two endlessly tinkering with the hurdy gurdy. I further filed down some of the keys, I've worked on tuning it (sometimes having to use filler to make the pegs fit tighter), experimented with rosin on the wheel and cotton on the strings, etc. I still need to work on the bridge some more, as right now the strings sit in very deep grooves. I think I'm just going to cut the surface of the bridge almost flat, so I can pull the melody strings off and on the wheel more easily.

I thought I'd do a wrap-up post, to review what I've learned, what I like, and what I dislike about this kit and the process. Here goes.

What I've learned:
- The right tool makes the job easier. I had to fudge a few times -- like using a lino cutter to trim the top instead of a good router, or using a circular saw when a coping or table saw would have done better. I had to improvise a bit, which was good, but it taught me the limitations of substitute tools.
- Measure twice, cut once. I knew this already, but it never hurts to brush up on the fundamentals. I'm not great at making straight cuts with a jig saw. Speaking of:
- Jig saws are terrifying. I don't know why I fear them, but I do. A new blade, however, makes a big difference.
- Wood putty does not varnish well. I used some filler on a few spots, thinking it would take to varnish, but it doesn't. You can stain it, but not varnish. Oh well -- one more component of my instrument's folksy appearance.
- Go slow. This was one of the first kit projects where I actually took my time and sweated the small stuff, and I think it paid off.
- Hand sanding is almost always better than machine sanding.

What I like about the Musicmaker's Hurdy Gurdy Kit:
- It really did have everything you needed to build the instrument. I didn't have to run out and find peg soap, weird gage strings, or anything. It was all there and did not assume I lived next to a fiddle shop.
- The wood is quality, and looks great.
- The resultant instrument, in the hands of a not-so-master-craftsman, is still playable and functional.
- The staff there were fantastic. When I noticed I was missing a part, they had it in the mail within a day. Brilliant.
- The kit was accurately described on their website, and the difficulty rating was accurate. It said there would be "character building" moments, and dammit, there were!

What I didn't like about the Musicmaker's Hurdy Gurdy Kit:
- The directions were usually clear and concise, but occasionally they lapsed or suffered from bad layout. For instance, at one point they tell you to drill the tail block as shown, but don't give you any measurements. So I eyeballed it. Turns out the measurements were somewhere else in the manual...fortunately I eyeballed it well.
- I really wish I didn't have to cut the brass for the handle-crank myself. I think they could have machined that for me...it was neither pleasant nor fun to do it myself with a jigsaw with a metal cutting blade, and the outcome wasn't great.
- The pegbox lid was a bit big...by the end of the process, I was too tired to cut it down. Again -- folksy! Small annoyance, yes.
- The final piece didn't quite line up with the measurements specified in the manual, despite every effort on my part. The most noticeable outcome of this was that I had to cut huge grooves in the bridge (probably a quarter-inch if not more) to get the strings to hit the wheel. As mentioned, I'm gonna hack down the bridge a bit more soon.

Don't get me wrong, though. The positives far outweighed the negatives here.

The most challenging parts of the process for me were (and please note that these challenges are more reflective of my ability, and not the quality and clarity of the kit):
- Cutting the wheel-hole. My old jig saw blade was likely most of the problem, but it was tricky to cut a perfectly square/straight rectangle. Folksy!
- Getting the body of the instrument symmetrical. I built a rig and tried to slowly bend it into place, but in the end, the instrument stayed a few centimeters off of center. Not the end of the world, but a little frustrating.
- Cutting the excess wood off of the side of the soundboard. I really should have practiced on something before letting loose. There are some little gouges on the top from the router, but they aren't all that noticeable.
- "Machining" the block of brass into a handle crank. Brass is soft, but it is still terrifying to tear into with a jig saw, and as much as I sanded and buffed, I could never quite get it straight and even. I think one of the holes will eventually fail because I drilled it slightly off. So I look forward to doing this again...ha ha ha.
- Installing and truing the wheel. This was a bitch, only because I was working in a tight spot (the wheel hole), and the axle that the wheel is on is threaded all the way down, so the wheel would move around if I didn't secure it just right. I did have to pull the whole thing out once and just do it all over again. I also had to widen the provided bushings to allow the wheel to turn freely, which I would have thought to be unnecessary. Truing the wheel was hard, and I was ultimately unsuccessful. There is a little "wow" in the sound, but nothing too awful.
- Getting the first sounds out of the instrument. This was discouraging after all the work I did, but after experimenting with rosin and cotton, I got some good tone. My only complaint is that the instrument is a little quiet. I wish it projected more...I don't have any sound holes, but the manual said they weren't necessary for sound production. I'm not so sure now...
- Cutting the grooves in the melody bridge. I'm still working on that.

Exhaustive? Exhausting? Yes, a bit of both. But I do enjoy playing this thing, and my friends and wife find it very intriguing...how many folks have a hurdy gurdy sitting on their china hutch?
Monday, October 6, 2008

Hurdy Gurdy: Done Deal

...so, it's pretty much a wrap:


Over the weekend I applied a few more coats of varnish. Then it was on to installing the wheel. The wheel is a three-layered wood job. Once put in, I had to "true" it, which means making sure it is even and not lopsided. This involved strapping the axle to an electric drill, and spinning the wheel while working over it with a chisel. I think I got it relatively straight. Then I had to install the handle, which lead to a problem.

When truing the wheel, the epoxy holding one of the bushings in the tailpiece failed, pushing the bushing inside the body of the instrument. After some pondering, swearing, and a few different shots, I got it out using a drywall anchor and a big screw. I re-cemented it, and that pretty much got it in there. Installing the handle was tricky, and at one point I had to take out the wheel again. But it's in there.

This morning I put the strings on and rosined the wheel. After about 2-3 hours of fiddling, I managed to get something that kind of sounded like music! The sound, at least initially, is a little whispy. I think I'll get used to how much rosin to apply and how much cotton to use (you wrap the strings in cotton where they contact the wheel) to get it to really sing.

This was an interesting project, and I'll publish some reflections on the process, the pros and cons of the kit, and what I got out of it. But for now, here's me playing "Amazing Grace" on the thing, to the best of my ability. I mean, it was only just finished this morning!

Friday, October 3, 2008

Hurdy Gurdy: At the Finish Line

...yesterday I reached a milestone: I finished gluing everything on the hurdy gurdy. There were an array of bridges, nuts, and blocks to be fastened, some of which needed holes drilled into them first. The instructions, usually pretty good, were a little imprecise with measurements (the bridge should be "about an inch" from the wheel hole -- mine wound up being more than an inch -- will it function?), and in one spot had the diagram for the hole placement on the tail-piece was on an entirely different page. Fortunately I guessed at it and got it in the right place.

I also jig-sawed the keys apart, after my disastrous attempt to separate them with a circular saw. I bought a new jig-saw blade, and that seemed to help. It still wasn't easy, without a good rig to secure the rack of keys. Some of the buttons got a little chewed up, but I was able to sand them all down ok, so they looked pretty consistent.

The only drag with this kit is that you have to cut the brass for the crank yourself. I bought a metal-cutting blade for the jigsaw, but it was still murderous, and my crank (you can see it on this photo) is uneven and lumpy. I sanded and buffed it as much as I could...

Here's the pre-varnish hurdy gurdy:


Now it's varnish time. Musikits varnish kit is actually pretty nice, and it had all the necessary clothes, sandpapers, and brushes. I sanded the whole thing down, then cleaned it with the cloth included. Then the varnish went on. I tried not to lay it on too thick...a little goes on a long way. Here it is, after the first coat:


The first coat has almost dried, so I flipped it over and did the bottom. I probably won't do second coats on the tiny pegs that go inside the key-chest, since no one sees them, but otherwise, tomorrow morning I'll probably sand it down and do a very thin second coat.

Wednesday, October 1, 2008

Hurdy Gurdy: I Am The Keymaster

...gotta love them Ghostbusters.

Last night I glued the keychest onto the soundboard, then this morning I spend many moments sanding down the keys (little narrow blocks of wood) so they'd fit freely into the keychest. Once that was done, I put them in and glued a long strip of wood to the outside. Once it dries, I'll cut the pieces apart from one another with a jig saw (pray for me) and voila, the keys for the hurdy gurdy.

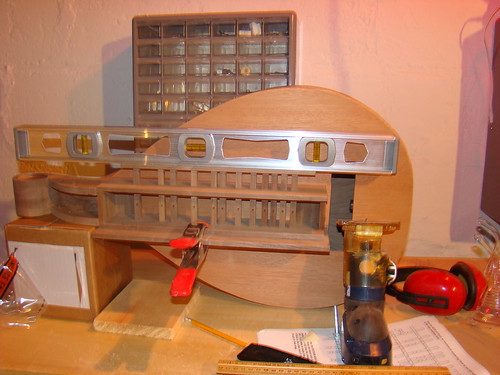
Here's the button stock drying on the keys. I flipped the instrument onto its side to take advantage of gravity, and am using a level to weigh down the button stock. This could come crashing down at any moment now.


One thing I will say about this project -- I've learned that, 7 times out of 10, hand-sanding is much more productive than using a power sander.

Tuesday, September 30, 2008

Hurdy Gurdy: Router? I Hardly Know Her!

This run of rainy days we've had have really kept hurdy gurdy production hurtling forth. Last night I glued the bottom on, and weighed it down with a pedal steel guitar and some hammers...gotta make due with what you have, right?

Well, kinda. This morning I went down to the Mega-Lo Hardware and got some supplies to carry me through to the end of this project...namely some wood filler, a chisel, some new jigsaw blades (maybe this will cure my fear of the jigsaw), and a few other things that I'll detail below.

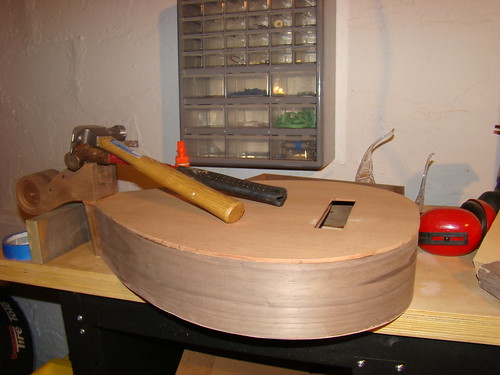
This morning I took the pedal steel off of the hurdy gurdy. It looked like this:


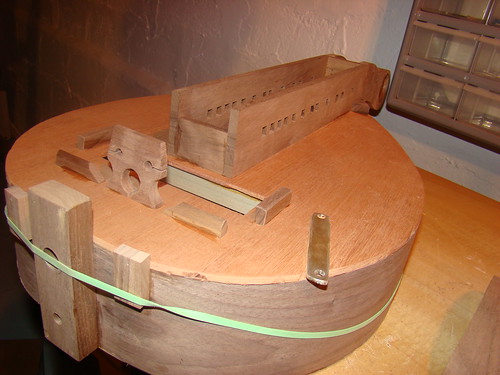
Note the overhang -- the soundboard (top) and bottom of the instrument were provided slightly oversized -- maybe three-quarters of an inch at most. This is helpful, because, as I've tediously relayed, the instrument is not a perfect teardrop shape. Now, the instructions to this kit are pretty good, for the most part. But it suggests that, if you don't have a router, you can take care of the overhang with course sandpaper.

Now, even you have all the time in the world and sandpaper grittier than a David Mamet screenplay, I don't know if you could eliminate a three-quarter inch overhang just by sanding it. Well, you could, but it would be a ridiculous amount of work. I pondered it for a while -- use the jigsaw? Circular saw? I wasn't gonna sand it endlessly. My solution was to use a hand-held router -- really a lino cutter, with a wood-cutting bit.

I'd never used this router before, but it worked pretty well. Unfortunately, I made the mistake of starting with the top -- I should have started with the bottom, as I made some errors and had to learn to control the device, and the results of my novice hand are more visible, since they are on top. There are some pock-marks made by the router...I tell myself it adds to the folksy quality of the instrument.

Here's how the first pass with the router looked. Yikes:


I then went over it with some sandpaper -- first with an electric sander, then by hand. I got it down to something reasonably smooth, if a little, um, folksy...then I glued the peghead on. Here's where we're at:

Monday, September 29, 2008

Hurdy Gurdy Diaries...Day Six, or Something

...Musikits rates the kits they offer by difficulty. They use a hammer scale. This hurdy gurdy has the maximum number of hammers. So I'm stepping into the deep end on this one, especially since I don't really have any carpentry or wood-working chops. The ranking said there would be "character building" moments. Hell yeah it does.

So, I left the hurdy gurdy in the straightening rig all weekend to try to fix the sides. It seemed to work, although it didn't get all the way straight. So, I flipped the instrument over so the top side was up, and glued the soundboard on while it was still in the rig. I was thinking maybe that attaching the soundboard would provide the last little bit of tension to move the head-block over.

Here it is. I weighed the soundboard down with a cymbal, some hammers, some tool batteries, a big magnet, and a tape measure. The spirit of Ybor City lives on:


Once that dried, I flipped it over and started looking at installing the bracing that went under the soundboard. First I had to taper the braces at either end, making them look more triangular at the corners -- like this, basically: /___ instead of this: |___. After another rough outing with the old jigsaw, I did it with a circular saw and it cut it like a hot knife through butter.

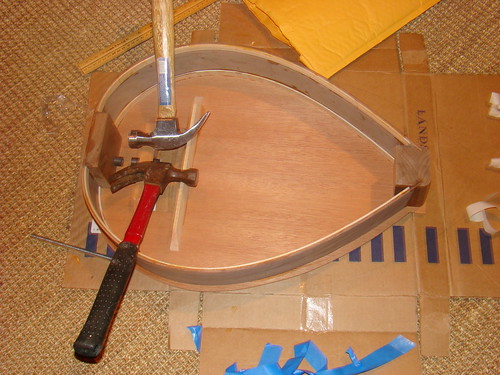
Then I widened the hole in the brace and the tail-block with a five-eighths inch counter-sink bit. That allowed me to slide nylon bushings into the brace and the tail-block. I used epoxy to secure the bushing into the brace, then positioned it so that the axle could spin relatively frictionlessly. I glued it in, along with a triangular brace that went on the other side of the wheel-hole. I cut the wheel-hole with the aforementioned jigsaw, and it wasn't exactly straight. But I think it will work. I weighed the braces down with some hammers:


It's sitting and drying now.

While that was happening, I glued the keychest together. This is a box that sits on top of the instrument and holds the keys that fret the strings. There are no guide pins or anything to hold it together -- you just have to glue the parts together and hope they stick! I used rubber bands to hold it all in place for the time being, and also put in the keys, just to be sure the sides were aligned.

Saturday, September 27, 2008

Day Three: The Hurdy Gurdy Moves

...so I left the hurdy gurdy in the straightening rig overnight, and it did move over about one centimeter: half of what I wanted it to do. Considering I had put in half the bracing strips, I took that to be progress.

This morning I took it out of the straightening rig, flipped it over, screwed it back in, and installed the bracing strips along the top. My wife looked over my shoulder and said "This looks like the height of tedium." I actually like the minutia, the problem solving, the tactile nature of it all. Whether it will result in a playable, presentable instrument is yet to be seen.

Here's how it looks now:

Friday, September 26, 2008

Hurdy Gurdy, Day Two

...the saga of the basement-built hurdy gurdy continues! I e-mailed MusiKits yesterday about the missing brass crank, and they responded almost immediately, saying they'd put a replacement crank in the mail. So that was nice! I also ordered a varnish kit to use later on -- if I ever get to that step!

So now that the tail block is set, last night I put the sides into the head block. While the sides were "pre-bent" according to the kit description, it took a surprising amount of tension to get them into the block. I was a little nervous, but it seemed to work. I also drilled a hole into the the side for the crank, which was surprisingly hard. 5/8 of an inch is a bit bigger than it sounds! Here's how it looked once the head block was glued and the hole drilled. (Sorry about the night-vision setting. That was an accident.)


The next step was to make sure the body was symmetrical. I traced an outline of the form onto a piece of cardboard, and then flipped the instrument-to-be over and compared the lines. It was definitely NOT symmetrical. The hurdy gurdy is supposed to be egg-shaped, but the head block was about two centimeters off center, which was noticeable to the naked eye. This has been a game of sixteenths of inches so far, so two centimeters was pretty substantial.

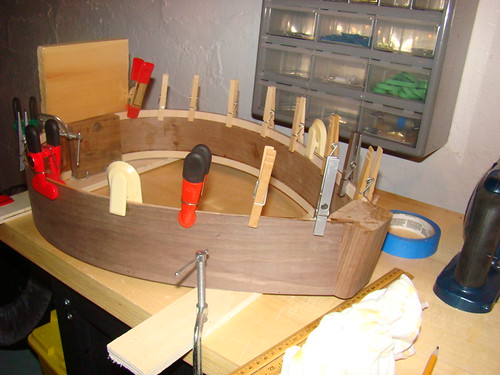
The instructions said, if the sides are mis-shapen, to use strong tape to pull the instruments sides into the proper shape. But the masking tape I tried was not strong enough, and I didn't have any other options. So I took some time and built a simple rig that held the tail block in place, while pulling the head block two centimeters over to the left. It looks like this:


It's not pretty, but it should work...fingers crossed. Then I laid in some support strips along the inside top (I can't do the strips on the bottom while it is in the straightening rig). Since I didn't have more than a few clothespins, I used chip-clips and clamps. Yikes.


I'm going to leave it in this rig overnight and see if it comes out straight by tomorrow. Cross your fingers.

Thursday, September 25, 2008

Hurdy Gurdy, Man -- Day One

I don't consider myself a craftsman, by any stretch of the imagination. I'm handy around the house, I guess. I can fix things, hang picture frames, mount towel racks, all that fun stuff. And I can keep the various instruments I have in working order, occasionally re-soldering a connection or tightening a loose fitting. But I use experts for things like electrical work, plumbing, and truss rod adjustment.

The only instruments I've built are really just toys -- a shoe-box sized koto made from a kit and a fretless banjo made from a cardboard mailing tube. But I'm home a lot more now, with my new freelance occupation, so I decided I'd take on a more sophisticated kit instrument. I perused Musikits.com, and, inspired by a French-Canadian band I saw at a local festival, settled on the Hurdy Gurdy: obscure, complexly mechanical yet devilishly simple...I ordered the kit, and the photo above is how it arrived.

I think this is a good time to say I've never heard the Donovan song "Hurdy Gurdy Man," but it's been sung to me several times since I announced this project to my friends.

So, first step was to take inventory of the parts. In classic, IKEA-esque fashion, it was missing the brass crank, so I wrote the company. Let's see how long it takes to get a replacement. Everything else -- dozens and dozens of bits of wood, metal, cotton, felt, plastic, rosin, and gut -- were all present.

Not wasting any time, I took on the first step and glued the sides to the tail-piece. This should have been easy, except I spent 45 minutes cleaning out my old bottle of woodglue, before realizing it wasn't usable. Again, I'm no expert. So I went to the hardware store and bought glue and two clamps. The woman looked at me and said "Doin' some clampin', eh?" What answer is there for that question?

Then I tackled the step I feared the most -- I cut the wheel-hole in the soundboard. I hate jigsaws, and have never been good with them. This hole is a little misshapen, but will fortunately be masked by a wheel-hole cover. When I was a kid, working in a warehouse, I broke a jigsaw blade and it was terrifying -- the metal shot out across the room. Safely safety goggled, I fired up my never-used Riobi saw and, well, the blade broke. This time it was less terrifying -- just a little crack and a pile of fragments. So I plugged in my wife's dad's old jigsaw, a metal behemoth that pre-dates most modern safety measures. It cut a little jagged, but I sanded it clean and I seem to have done okay. Not perfect. But hey, that's life...