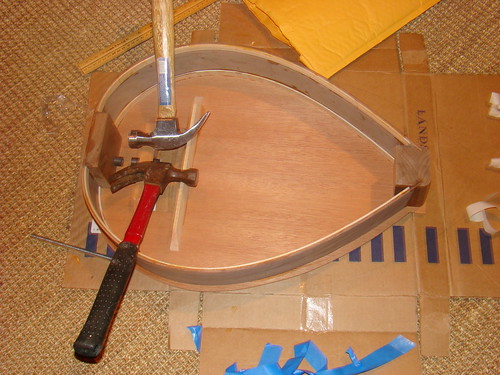
So, I left the hurdy gurdy in the straightening rig all weekend to try to fix the sides. It seemed to work, although it didn't get all the way straight. So, I flipped the instrument over so the top side was up, and glued the soundboard on while it was still in the rig. I was thinking maybe that attaching the soundboard would provide the last little bit of tension to move the head-block over.
Here it is. I weighed the soundboard down with a cymbal, some hammers, some tool batteries, a big magnet, and a tape measure. The spirit of Ybor City lives on:

Once that dried, I flipped it over and started looking at installing the bracing that went under the soundboard. First I had to taper the braces at either end, making them look more triangular at the corners -- like this, basically: /___ instead of this: |___. After another rough outing with the old jigsaw, I did it with a circular saw and it cut it like a hot knife through butter.
Then I widened the hole in the brace and the tail-block with a five-eighths inch counter-sink bit. That allowed me to slide nylon bushings into the brace and the tail-block. I used epoxy to secure the bushing into the brace, then positioned it so that the axle could spin relatively frictionlessly. I glued it in, along with a triangular brace that went on the other side of the wheel-hole. I cut the wheel-hole with the aforementioned jigsaw, and it wasn't exactly straight. But I think it will work. I weighed the braces down with some hammers:

It's sitting and drying now.
While that was happening, I glued the keychest together. This is a box that sits on top of the instrument and holds the keys that fret the strings. There are no guide pins or anything to hold it together -- you just have to glue the parts together and hope they stick! I used rubber bands to hold it all in place for the time being, and also put in the keys, just to be sure the sides were aligned.


No comments:
Post a Comment